How to install O connect

Modified on Wed, 14 Jul, 2021 at 1:15 PM

How to install step by step


Step 1

  • Please download the app Oconnect first, from either the App Store or Google Play.


Step 2

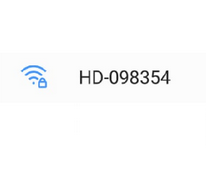
  • Connect to the network HD-XXXXX (each doorbell has its own unique network name).
  • Please ignore any messages about 'internet not available'
  • Return to the app


Step 3

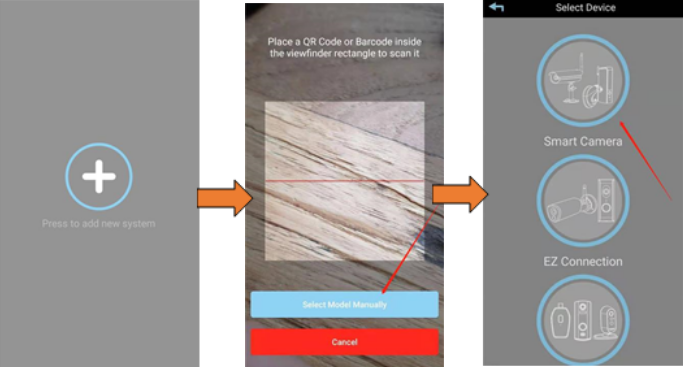
  • Select '+' to add a new camera/doorbell.
  • Select "Model manually"
  • Select "EZ connection" 
  • Select "Existing device"


Step 4

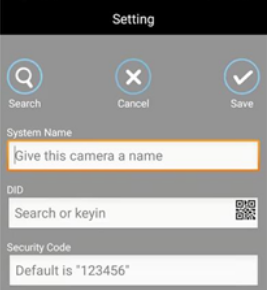
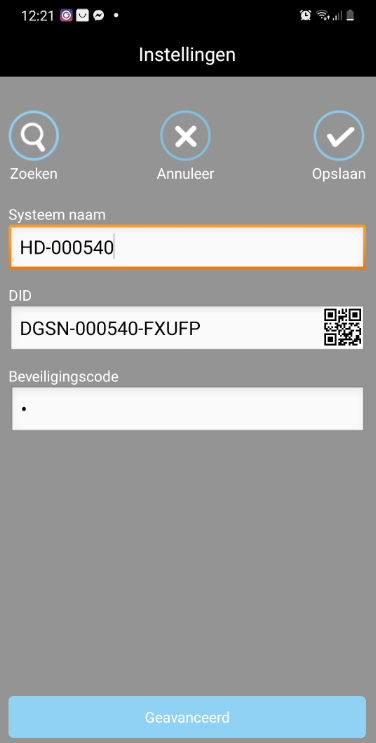
  • Now press 'Search'  and select the DID number that pops up. Tap the DID and it will be entered automatically.
  • Give your doorbell a name of your choosing at 'System Name'.
  • Enter the default password '123456'.
  • Finally, press 'Save'


Step 4

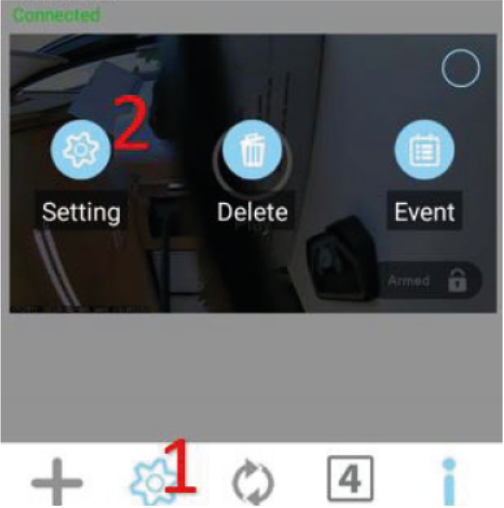
  • The doorbell should now say 'Connected'  in the app. 
  • Tap the settings symbol (cog), and a second settings symbol appears on the center of your screen.
  • Tap the second settings symbol and you will return to the previous screen described at Step 3.


Step 5

  • Tap 'Advanced'.
  • Enter the default admin password: '123456' .
  • You will be asked to change it, please do so.
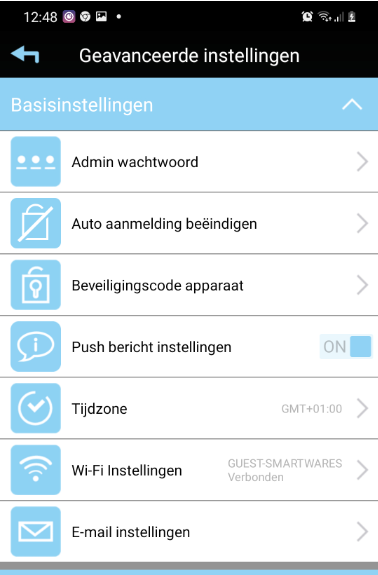
  • You will now see the Advanced settings menu.
  • Select Basic settings


Step 6

  • Tap WiFi Setup and select the pull-down menu to display all available WiFi networks in range.
  • Select your own network, enter the correct password and tap 'Ok' .
    The doorbell will now reboot and you will return in to the camera overview.
  • It may take several minutes before the doorbell will display 'Connected' again.
  • Your doorbell is now installed and ready to use

Note: Only 2.4GHz networks are supported.


Was this article helpful?

That’s Great!

Thank you for your feedback

Sorry! We couldn't be helpful

Thank you for your feedback

Let us know how can we improve this article!

Select at least one of the reasons
CAPTCHA verification is required.

Feedback sent

We appreciate your effort and will try to fix the article